
The aroma of freshly brewed coffee is a universal wake-up call, a comforting ritual, and often, the first step to a productive day. But what happens when your trusty coffee maker decides to call it quits, or you find yourself far from electrical outlets and fancy gadgets?
Fear not, fellow coffee enthusiasts! The notion that you need an elaborate machine to enjoy an exceptional cup is a myth. In fact, some of the most satisfying coffee experiences come from mastering the art of the manual brew. This comprehensive guide will show you exactly how to brew coffee without a machine in 2025, proving that simplicity often yields the most profound flavors.
Whether you’re camping, enduring a power outage, or simply seeking a more mindful approach to your daily caffeine, understanding these techniques will elevate your coffee game significantly.
Key Takeaways
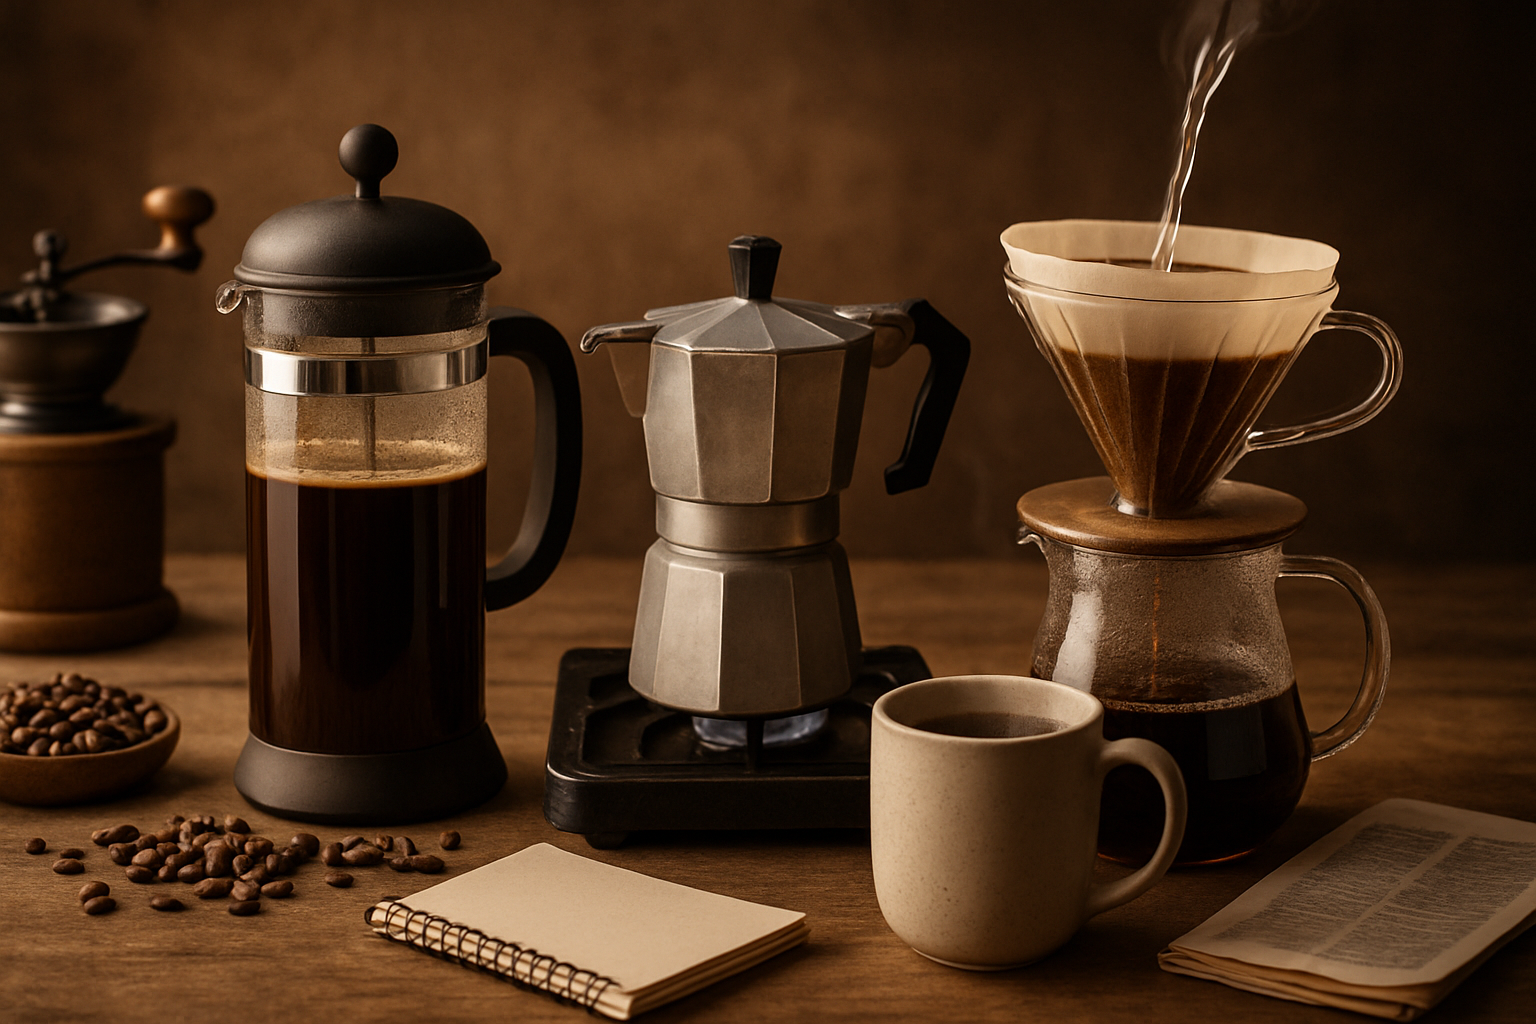
- Embrace Manual Methods: Many techniques, including French Press, Moka Pot, and Pour Over, allow for exquisite coffee without electricity.
- Grind Matters Immensely: The correct grind size for your chosen method is crucial for extraction and flavor. A hand grinder is a valuable investment.
- Water Quality and Temperature: Filtered water and precise temperature control (around 195-205°F or 90-96°C) significantly impact the final taste.
- Ratio is King: Understanding the coffee-to-water ratio (typically 1:15 to 1:18) ensures a balanced and flavorful brew.
- Patience and Practice: Manual brewing is an art. Experimentation with variables like steep time and pour speed will refine your technique and taste.
Why Learn How to Brew Coffee Without a Machine?
There’s a unique charm and immense satisfaction in crafting your coffee by hand. It’s a return to basics, a mindful moment in our fast-paced 2025 world. Beyond the romantic notion, there are several practical reasons why learning how to brew coffee without a machine is an invaluable skill:
- Portability: Manual brewers are often compact and require no electricity, making them perfect for travel, camping, hiking, or even just a picnic in the park. Imagine waking up in a remote wilderness, grinding your beans by hand, and savoring a perfect cup as the sun rises.
- Emergency Preparedness: Power outages happen. When they do, a hand grinder and a stovetop Moka pot or French press can be your best friends.
- Enhanced Flavor Control: Manual methods often offer greater control over variables like water temperature, pour rate, and steep time, allowing for a more nuanced extraction and a cup tailored precisely to your preferences.
- Cost-Effectiveness: High-quality manual brewing equipment is generally much more affordable than espresso machines or automatic drip brewers, and it often lasts longer with proper care.
- Sustainability: Many manual methods use less energy and can produce less waste, especially when paired with reusable filters.
- Mindfulness: The ritual of manual brewing forces you to slow down, engage your senses, and appreciate the process, transforming a simple drink into an experience.
Understanding the Fundamentals: The Pillars of Great Manual Coffee
Before diving into specific methods, it’s essential to grasp the universal principles that underpin all excellent coffee brewing, especially when you’re exploring how to brew coffee without a machine. Think of these as your brewing commandments.
1. The Quality of Your Beans ☕
Start with fresh, whole beans. Coffee begins to lose its flavor and aroma shortly after grinding. Buying whole beans and grinding them right before brewing is the single most impactful step you can take to improve your coffee. Look for specialty coffee roasters who provide roast dates – ideally, coffee should be brewed within 2-3 weeks of its roast date for optimal flavor.
2. The Importance of Grind Size 📏
This is perhaps the most critical factor after bean quality. The grind size dictates how quickly water extracts flavor from the coffee.
- Too fine: Over-extraction, leading to bitter, astringent, and often muddy coffee.
- Too coarse: Under-extraction, resulting in weak, sour, and watery coffee.
We’ll discuss specific grind sizes for each method, but a good burr grinder (manual or electric) is a worthwhile investment. Blade grinders chop inconsistently, creating a mix of fine dust and large chunks, which leads to uneven extraction. For guidance on finding the best tools for your brewing journey, explore resources on Brewing Perfection: Your Ultimate Guide to the Drip Coffee Maker
3. Water Quality and Temperature 🌡️
Coffee is 98% water, so the quality of your water matters immensely. Filtered water is always preferred over tap water, which can contain chlorine or minerals that impart off-flavors.
As for temperature, the ideal range is generally between 195-205°F (90-96°C). Water that’s too hot can scorch the coffee, leading to bitterness, while water that’s too cool will under-extract, resulting in a weak and sour brew. If you don’t have a thermometer, letting boiled water sit for about 30-60 seconds after it comes off the boil usually gets it into the right range.
4. The Golden Coffee-to-Water Ratio ⚖️
This is often expressed as a ratio, typically between 1:15 and 1:18 (coffee mass to water mass). This means for every 1 gram of coffee, you’d use 15 to 18 grams of water.
- Example: For a strong 1:15 ratio, if you want to make 300g of coffee, you’d use 20g of coffee grounds (300g / 15).
- Example: For a balanced 1:17 ratio, if you want to make 300g of coffee, you’d use about 17.6g of coffee grounds (300g / 17).
Using a kitchen scale to measure both coffee and water by weight, rather than volume, provides far greater consistency and accuracy.
5. Contact Time (Steep Time) ⏳
How long the water and coffee grounds interact is crucial. Each brewing method has an optimal contact time. Too short, and the coffee will be weak; too long, and it can become over-extracted and bitter.
Essential Gear for Brewing Coffee Without a Machine
While the goal is to brew without a machine, some basic tools will significantly enhance your experience. Consider these fundamental investments for your manual coffee journey in 2025:
| Item | Description | Why It’s Essential |
|---|---|---|
| Coffee Beans | Freshly roasted, whole beans. | The foundation of great coffee. Always start with quality. |
| Burr Grinder | Manual hand grinder or electric burr grinder (if power available, but hand is better for no-machine scenarios). | Ensures consistent grind size for optimal extraction. Critical for all methods. |
| Kettle | Gooseneck kettle (for pour-over) or a standard stovetop kettle. | For heating water efficiently. Gooseneck allows for controlled pouring. |
| Kitchen Scale | Digital scale with gram measurement. | For precise measurement of coffee grounds and water, ensuring consistency. |
| Timer | Stopwatch on your phone or a dedicated timer. | To accurately track contact time for optimal extraction. |
| Filtered Water | Bottled or filtered tap water. | Improves coffee flavor by removing impurities. |
| Measuring Spoon/Scoop | For convenience, though weighing is preferred. | Handy for quick estimation, but less precise than a scale. |
Popular Methods: How to Brew Coffee Without a Machine
Let’s explore the most common and effective ways to brew a fantastic cup of coffee using no electricity and minimal equipment. Each method offers a unique flavor profile and experience.
1. The French Press: A Classic for Bold Flavor
The French Press is arguably one of the simplest and most forgiving methods for brewing coffee without a machine. It’s beloved for producing a rich, full-bodied cup with a velvety texture, as the metal mesh filter allows fine coffee particles and oils to pass through, contributing to its signature mouthfeel.
Ideal Grind: Coarse (like sea salt)
A coarse grind is essential for the French press. Finer grinds will pass through the filter, resulting in a muddy cup, and can also lead to over-extraction and bitterness.
Equipment Needed:
- French Press
- Coarse-ground coffee
- Hot water (195-205°F / 90-96°C)
- Stirring spoon (non-metal is best to avoid scratching the carafe)
- Timer
- Kitchen scale (optional but recommended)
Step-by-Step French Press Method:
- Heat Water: Bring your filtered water to a boil, then let it rest for 30-60 seconds to reach the ideal temperature.
- Preheat Press: Pour a small amount of hot water into your French press, swirl it around, and then discard. This helps maintain the brewing temperature.
- Add Coffee: For every 8 ounces (approx. 240g) of water, use 1-2 tablespoons (approx. 14-20g) of coarse-ground coffee. A good starting ratio is 1:15 (e.g., 20g coffee to 300g water).
- Anecdote: “I remember once on a backpacking trip, my battery-powered grinder died. I had to use a makeshift pestle and mortar for my French press. The grind wasn’t perfect, but the remote mountain air and the rich, imperfect brew made it one of the most memorable cups of my life. It really taught me that necessity is the mother of invention, and how to brew coffee without machine in unconventional ways.”
- First Pour (Bloom): Pour about double the weight of your coffee in hot water over the grounds (e.g., 40g water for 20g coffee). Ensure all grounds are saturated. This step is called the “bloom” and allows gases to escape, leading to better flavor extraction. Let it bloom for 30 seconds.
- Second Pour & Stir: Pour the remaining hot water into the press. Gently stir the coffee, ensuring all grounds are fully submerged.
- Steep: Place the lid on the French press, but do not press the plunger down yet. Let the coffee steep for 4 minutes.
- Press: Slowly and steadily press the plunger all the way down. If it’s too difficult to press, your grind might be too fine. If it plunges too easily, it might be too coarse.
- Serve Immediately: Pour the coffee into your mug right away. Leaving it in the press will continue the extraction, leading to over-extraction and bitterness.
Tip: If you find the coffee muddy, consider sifting out the very fine particles after grinding, or experimenting with a slightly coarser grind.
2. The Moka Pot: Italian Espresso-Style Coffee
The Moka Pot, a stovetop espresso maker, is a classic Italian invention that produces strong, concentrated coffee, similar in intensity to espresso but without the crema. It’s a fantastic method for how to brew coffee without a machine if you crave a bold, robust cup that stands up well to milk.
Ideal Grind: Medium-Fine (like table salt, slightly coarser than espresso)
A grind that’s too fine will pack too tightly, preventing water from pushing through and potentially causing pressure issues. Too coarse, and the coffee will be weak.
Equipment Needed:
- Moka Pot (various sizes available)
- Medium-fine ground coffee
- Water
- Stovetop or heat source
Step-by-Step Moka Pot Method:
- Fill Base: Fill the lower chamber with cold water up to the safety valve. Do not overfill.
- Add Coffee: Insert the metal filter basket and fill it loosely with your medium-fine ground coffee. Do not tamp or compress the coffee, just level it gently with your finger.
- Expert Insight: “The Moka Pot is a bit of a science experiment on the stovetop,” says renowned barista, Elena Rossi. “The steam pressure is key, and an even, un-tamped bed of coffee allows for the perfect journey of water through the grounds.”
- Assemble: Screw the upper chamber tightly onto the base. Ensure a secure seal to build proper pressure. Use a towel if the base is hot from preheating.
- Heat: Place the Moka Pot on a stovetop over medium-low heat. The key is to brew slowly; high heat can burn the coffee and create a metallic taste.
- Brew: The water in the lower chamber will heat up, create steam pressure, and force hot water up through the coffee grounds into the upper chamber. Listen for a gurgling sound and watch for coffee to flow into the top.
- Remove from Heat: Once the upper chamber is nearly full and you hear a distinct gurgling or sputtering sound, immediately remove the Moka Pot from the heat. This prevents the coffee from over-extracting or developing a burnt taste.
- Serve: Pour the concentrated coffee into cups. It’s strong, so it can be enjoyed black, with milk, or diluted with hot water for an Americano-style drink.
Tip: Some enthusiasts fill the lower chamber with hot (not boiling) water to speed up the process and reduce the time the coffee is exposed to heat, which can lead to a cleaner taste.
3. Pour Over: The Art of Precision Brewing
The Pour Over method is celebrated for producing a clean, bright, and nuanced cup of coffee. It requires a bit more precision and attention than other methods, making it a favorite among those who enjoy the ritual. It’s an excellent choice for learning how to brew coffee without a machine when you want to highlight the intricate flavors of high-quality beans.
Ideal Grind: Medium (like table salt)
A medium grind is ideal. Too fine, and the water will struggle to pass through, leading to over-extraction and bitterness. Too coarse, and the water will flow too quickly, resulting in under-extraction and a weak, sour cup.
Equipment Needed:
- Pour Over dripper (e.g., Hario V60, Chemex, Kalita Wave)
- Paper filters specific to your dripper
- Gooseneck kettle (for controlled pouring)
- Medium-ground coffee
- Hot water (195-205°F / 90-96°C)
- Mug or carafe
- Kitchen scale with timer (highly recommended)
Step-by-Step Pour Over Method:
- Heat Water: Bring filtered water to a boil, then let it rest for 30-60 seconds.
- Prepare Filter: Place the paper filter in the dripper. Rinse the filter thoroughly with hot water to remove any paper taste and preheat the dripper and mug/carafe. Discard the rinse water.
- Add Coffee: Add your medium-ground coffee to the rinsed filter. Gently shake the dripper to level the coffee bed. Place the dripper and mug/carafe on your kitchen scale and tare it to zero.
- Personal Story: “My partner, a graphic designer, is obsessed with the aesthetic of pour-over. For his birthday in 2025, I got him a beautiful ceramic dripper and a sleek gooseneck kettle. Now, every morning, he meticulously measures, blooms, and pours, turning his coffee routine into a meditative art form. It’s amazing to see how a simple change in brewing method can transform a daily habit.”
- First Pour (Bloom): Start your timer. Pour about twice the weight of your coffee in hot water over the grounds, ensuring all grounds are saturated. This causes the coffee to “bloom” as gases escape. Let it bloom for 30-45 seconds.
- Second Pour & Subsequent Pours: Begin pouring in a slow, steady, concentric spiral from the center outwards, avoiding pouring directly onto the filter walls. Maintain a consistent water level, allowing the water to fully drain between pours.
- Goal: Aim for a total brew time of 2:30 to 4:00 minutes, depending on the dripper and recipe.
- Ratio: Continue pouring until you reach your desired coffee-to-water ratio (e.g., 300g water for 20g coffee).
- Serve: Once all the water has drained, remove the dripper and enjoy your clean, aromatic cup of coffee.
Tip: Experiment with different pour rates and patterns. A slower, more controlled pour generally leads to better extraction.
4. Cowboy Coffee: The Ultimate Primitive Brew
When all else fails, or you’re truly in the wild, there’s always cowboy coffee. It’s raw, simple, and effective, making it the quintessential answer to how to brew coffee without a machine in the most basic settings. It might not be the most refined cup, but it’s guaranteed to get the job done.
Ideal Grind: Coarse (similar to French Press)
A coarse grind will help the grounds settle at the bottom, making the final pour less silty.
Equipment Needed:
- Pot or saucepan
- Coarse-ground coffee
- Water
- Heat source (campfire, stovetop, etc.)
- Mug
Step-by-Step Cowboy Coffee Method:
- Heat Water: Pour your desired amount of water into a pot and bring it to a rolling boil.
- Add Coffee: Once boiling, remove the pot from the heat. Add your coarse-ground coffee directly into the hot water. A general guideline is 1-2 tablespoons per 8 ounces of water.
- Stir & Steep: Give the mixture a good stir. Let it steep for 4-5 minutes.
- Settle Grounds: To help the grounds settle, pour about a tablespoon of cold water into the pot. This causes the grounds to sink to the bottom.
- Pour Carefully: Slowly and carefully pour the coffee into your mug, leaving the grounds behind in the pot. You’ll likely get a little sediment, which is part of the cowboy coffee experience!
Tip: If you have a small strainer, you can pour the coffee through it for a cleaner cup.
Mastering the Grind: Your Hand Grinder is Your Best Friend
For consistently excellent coffee without a machine, a manual burr grinder is indispensable. Unlike blade grinders that chop beans unevenly, a burr grinder crushes them between two abrasive surfaces, resulting in a uniform grind. This consistency is crucial for even extraction, regardless of the brewing method you choose.
Why a Burr Grinder?
- Consistency: Produces uniform particle size, leading to predictable and better-tasting coffee.
- Flavor: Prevents over or under-extraction that comes from mixed grind sizes.
- Durability: High-quality burr grinders are built to last.
- Portability: Manual burr grinders are perfect for travel or camping as they require no electricity.
When selecting a grinder, consider one with ceramic burrs for durability and sharpness. Look for models that offer easy adjustment settings for different grind sizes. Investing in a good hand grinder is a game-changer for anyone serious about how to brew coffee without a machine. It complements any manual method by providing the foundational element of a quality brew. For those interested in optimizing their online presence, the principle of foundational elements is similar to Coffee Roasters Scotland: Read This Before Purchase – a strong start makes all the difference.
Troubleshooting Common Manual Brewing Problems
Even with the best intentions, manual brewing can sometimes go awry. Here’s a quick guide to common issues and their solutions when learning how to brew coffee without a machine:
| Problem | Possible Cause | Solution |
|---|---|---|
| Weak/Sour Coffee | Under-extraction, too coarse grind, too low water temp, insufficient contact time, too little coffee. | Grind finer, increase water temperature, extend steep time, use more coffee, ensure water fully saturates grounds. |
| Bitter/Astringent Coffee | Over-extraction, too fine grind, too hot water temp, too long contact time, too much coffee. | Grind coarser, decrease water temperature, shorten steep time, use less coffee, ensure proper bloom. |
| Muddy/Silty Coffee | Too fine grind (especially French Press), poor filtering. | Grind coarser, ensure French Press plunger filter is clean and properly seated, consider double-filtering (French Press). |
| Slow Brew Time (Pour Over/Moka Pot) | Grind too fine, filter clogged. | Grind coarser, ensure Moka Pot filter basket is not overfilled or tamped, check for mineral buildup in Moka Pot components. |
| Metallic Taste | Moka Pot brewed too hot or for too long. | Reduce heat and remove Moka Pot from heat as soon as coffee reaches upper chamber. Ensure Moka Pot is clean and free of old coffee oils. |
Beyond the Basics: Enhancing Your Manual Brew Experience
Once you’ve mastered the core methods for how to brew coffee without a machine, you can start exploring ways to refine and personalize your coffee journey.
Experiment with Different Beans
Different origins (Ethiopian, Colombian, Sumatran, etc.) and roast levels (light, medium, dark) offer a vast spectrum of flavors. Pay attention to the tasting notes provided by roasters. For instance, an Ethiopian Yirgacheffe might shine in a pour-over, while a dark roast from Brazil could be perfect for a French press or Moka pot.
Consider a Travel Kit
For those constantly on the go, assembling a dedicated manual coffee travel kit can be a game-changer. This might include a compact hand grinder, a mini French press or AeroPress, and a small, insulated mug. It’s all about embracing the convenience of the manual brew.
Cleaning and Maintenance
Proper cleaning is essential for the longevity of your equipment and the taste of your coffee. Coffee oils can build up and become rancid, imparting off-flavors.
- French Press: Disassemble the plunger and clean the mesh filter thoroughly after each use.
- Moka Pot: Wash with hot water and a mild soap (avoid harsh detergents that can strip the aluminum). Ensure it’s completely dry before storing to prevent oxidation.
- Pour Over Dripper: Rinse thoroughly. If using ceramic, a gentle scrub can remove any residue.
Regular maintenance ensures your equipment is always ready for the next delightful manual brew. Just as website security is critical for smooth operations, as discussed in Coffee Brewing Methods 16 Different Ways To Make It, keeping your brewing gear pristine ensures optimal performance and taste.
Conclusion: Embrace the Manual Coffee Revolution
Learning how to brew coffee without a machine is more than just a survival skill for power outages or remote travel; it’s an invitation to a more mindful, flavorful, and rewarding coffee experience. In a world increasingly dominated by automation, taking the time to hand-craft your morning cup offers a unique sense of accomplishment and connection to a centuries-old ritual.
From the rich, full-bodied immersion of a French Press to the concentrated strength of a Moka Pot and the clean precision of a Pour Over, there’s a manual method to suit every taste and situation. By focusing on quality beans, the right grind size, precise water temperature, and accurate ratios, you unlock a world of coffee flavors previously obscured by convenience.
So, in 2025, ditch the complexity, embrace the simplicity, and rediscover the profound pleasure of a perfectly brewed cup, crafted by your own hands. The journey of manual coffee brewing is one of discovery, patience, and ultimately, immense satisfaction.
Actionable Next Steps:
- Invest in a Hand Grinder: If you don’t have one, make this your first purchase. It’s the single most impactful upgrade for manual brewing.
- Choose Your First Method: Start with a French Press for its forgiving nature, or a Moka Pot for a strong brew.
- Practice Consistently: Like any skill, practice makes perfect. Experiment with different variables until you find your ideal brew.
- Explore New Beans: Don’t be afraid to try different origins and roasts to discover new flavor profiles.
- Share Your Knowledge: Teach a friend or family member how to brew coffee without a machine and spread the joy of manual brewing!
References
[1] Hoffmann, James. The World Atlas of Coffee: From Beans to Brewing – Coffees Explored, Explained and Enjoyed. Octopus Books, 2018.
[2] Rao, Scott. Everything But Espresso: A Guide to Great Coffee Brewing. self-published, 2010.
Discover more from 101 Amazing Coffee
Subscribe to get the latest posts sent to your email.

